Skip to content
  • About Kate
  • Before/after- Renos
    • Bathroom Renovation
    • Home Gym
    • Powder Room Renovation
    • Stairs Renovation
  • DIY Furniture
    • Aged wood coffee tables
    • Coffee Table
    • Guest bedroom headboard
    • King Sized Wood Headboard
    • Kitchen Cabinet doors
    • Side Tables
  • DIY Projects
    • Art
      • 3 Piece Abstract – Bedroom
      • Abstract Art
      • Northern Lights Wall Art
      • Peacock Spray Wall Art
    • Classy Study wall
    • DIY Outdoor Firepit
    • Fun closet floor
    • Insulating around windows and doors
    • Refurbished light
    • Roofing
  • DIY Videos
    • DIY – Repairing a Rotten Porch Post
    • How to Change your Tires – DIY
    • How to repair Drywall
    • Oil Change – BMW 328i
    • Whitewash your brick Fireplace!
  • Floral
    • Cottage Wedding flowers
    • Farm Wedding
    • General Bouquets
    • Oma’s Casket Spray
    • Outdoor Wedding
    • Tip: Bring a wilting Hydrangea back to Life!
  • Sweets
    • Baby Shower Cakes
    • Birthday Cakes
      • Banjo Cake
      • Barbie Cake
      • Champagne Cake – Gluten Free
      • Guitar Cake
      • Heart/Crossbone Cake
      • Hockey Cake
      • Kaden’s Batman Cake
      • Smash Cake & Cupcakes
    • Gingerbread houses
      • Japanese Dojo
      • Winter wonderland
  • About Kate
  • Before/after- Renos
    • Bathroom Renovation
    • Home Gym
    • Powder Room Renovation
    • Stairs Renovation
  • DIY Furniture
    • Aged wood coffee tables
    • Coffee Table
    • Guest bedroom headboard
    • King Sized Wood Headboard
    • Kitchen Cabinet doors
    • Side Tables
  • DIY Projects
    • Art
      • 3 Piece Abstract – Bedroom
      • Abstract Art
      • Northern Lights Wall Art
      • Peacock Spray Wall Art
    • Classy Study wall
    • DIY Outdoor Firepit
    • Fun closet floor
    • Insulating around windows and doors
    • Refurbished light
    • Roofing
  • DIY Videos
    • DIY – Repairing a Rotten Porch Post
    • How to Change your Tires – DIY
    • How to repair Drywall
    • Oil Change – BMW 328i
    • Whitewash your brick Fireplace!
  • Floral
    • Cottage Wedding flowers
    • Farm Wedding
    • General Bouquets
    • Oma’s Casket Spray
    • Outdoor Wedding
    • Tip: Bring a wilting Hydrangea back to Life!
  • Sweets
    • Baby Shower Cakes
    • Birthday Cakes
      • Banjo Cake
      • Barbie Cake
      • Champagne Cake – Gluten Free
      • Guitar Cake
      • Heart/Crossbone Cake
      • Hockey Cake
      • Kaden’s Batman Cake
      • Smash Cake & Cupcakes
    • Gingerbread houses
      • Japanese Dojo
      • Winter wonderland
KDA Designs

Home Gym

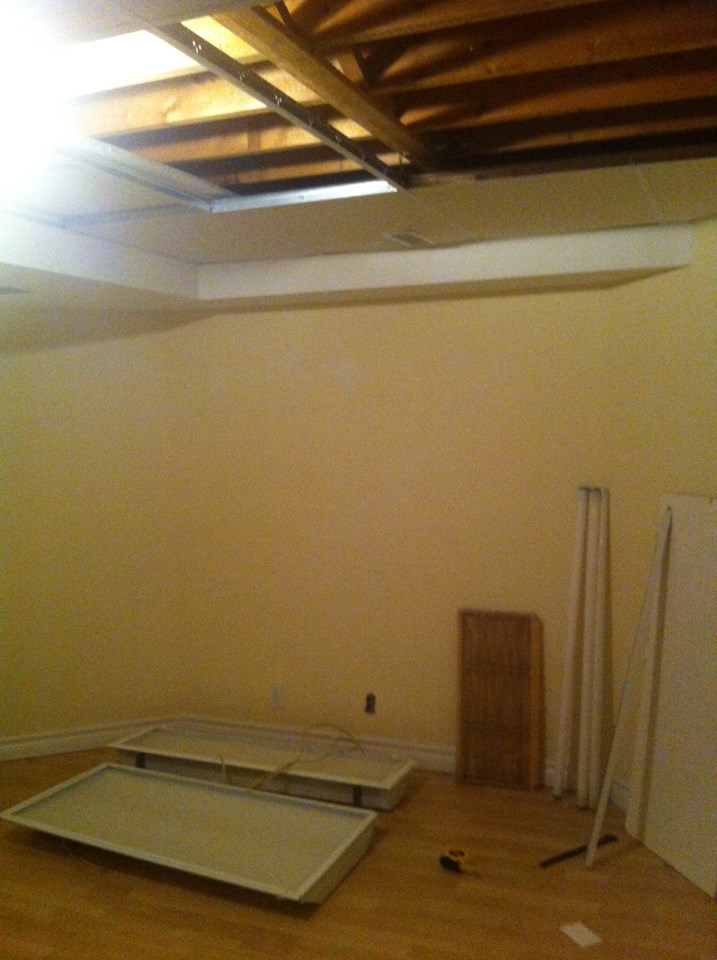
I had a room in the basement that was not utilized and I needed a space to put my gym equipment. The issue I had was most of my basement had the drop down ceiling tiles and every time I rode my elliptical, my head hit the ceiling. So, i decided to rip the ceiling tiles down and raise the ceiling to the beams to maximize height. Below are the before pictures of the room.
12108271_950792611649885_3065268552736962075_n 12118891_950792728316540_480000883298887360_n


I then filled up any holes with plaster, sanded and painted it so that I could get rid of the yellow. I also removed all the ceiling tiles and the metal rods used to hold them up. (those went to the recycling depot)

12122678_950793144983165_2034865896961843965_n 12109253_950792748316538_9103002508172758137_n


Once I had exposed the beams, I drilled holes into each beam and ran wires through each hole. The wire was for the commercial potlights I was going to put in the ceiling. (So much better than the flurescent lighting I had in before)

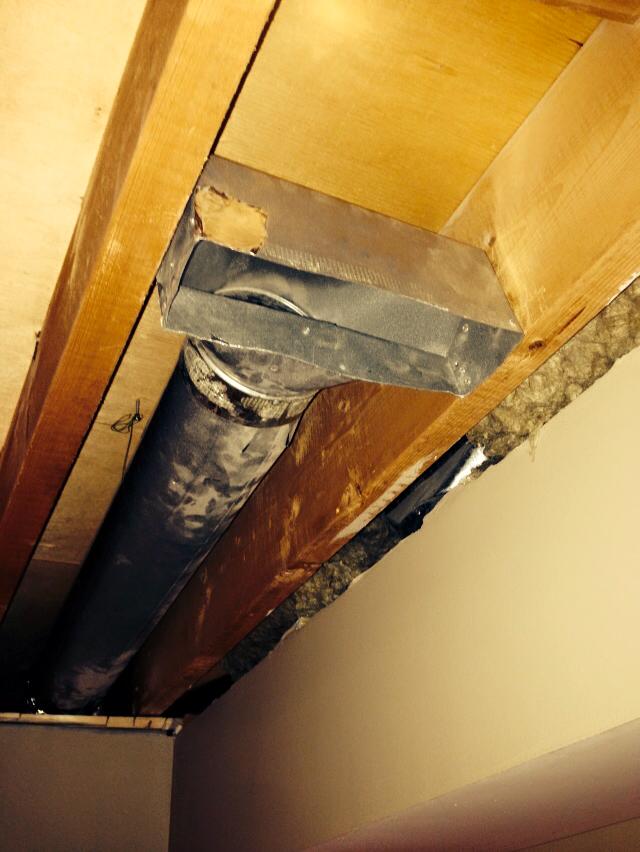
1610054_985210951541384_850884219276487423_nThe vent was in the ceiling but I needed to relocate it so I added another piece of duct and wrapped each seam with metal tape. This is a good idea to ensure no heated/conditioned air escapes through cracks.
941027_985210894874723_5733859661589802652_n 1929911_985210908208055_658059348240899210_n


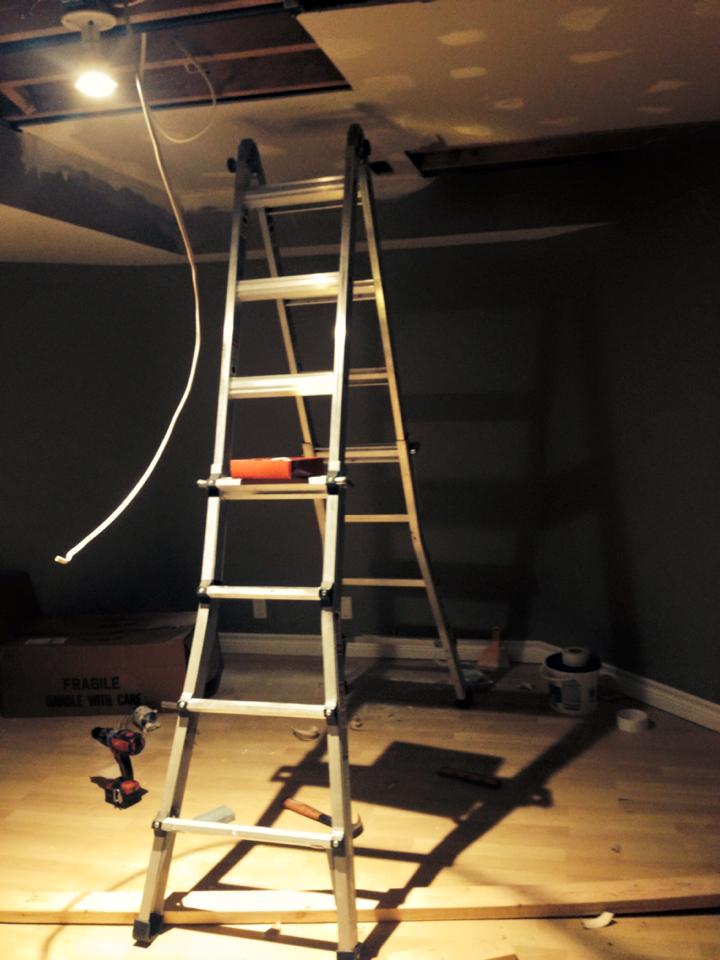
Once my wiring was done and my vent was secured in place, I started adding the drywall pieces. I had a bit of a gap between the wall and ceiling so I taped it and smoothed it over with plaster. You have to be patient during this process. Always let the plaster dry, sand, and then reapply. Use your hands to go over the spots so you know that it is smooth.

When I was done hanging the drywall, I used a drywall knife to cut holes in the ceiling for the potlights. (these are the kind you pop in after the drywall is up – not all potlights are made for after drywall installation) I had marked the ceiling beams on the wall before I cut the holes so I knew where the ceiling was open. I then pulled the wires through (about 10″ per light to give myself enough room to work)
1394_985210998208046_4342320409355943861_n 940848_1005230542872758_2435402927838997047_n


Once I had plastered and sanded the ceiling out, I did my first coat of flat ceiling paint. Do not use a glossy paint on the ceiling as you will see any imperfections more easily.
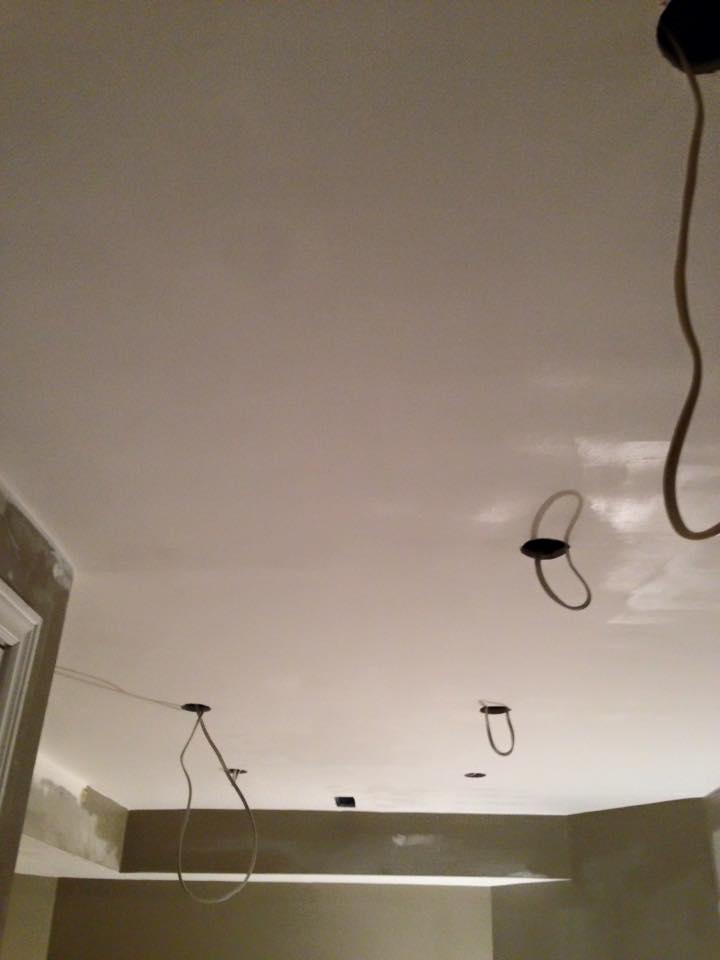
12642531_1005230569539422_8271577355925524337_nAll that was left after this stage was to add the potlights and touch up the walls. :) Fini!!

12647186_1005230592872753_8165683986778283203_n

Archives

  • February 2025
  • January 2019
  • December 2018
  • November 2017

Calendar

May 2026
M T W T F S S
 123
45678910
11121314151617
18192021222324
25262728293031
« Feb    

Categories

  • ABOUT
  • DIY Projects
  • Home Renovations
  • Interior Decorating
  • Videos

Copyright KDA Designs 2026 | Theme by ThemeinProgress | Proudly powered by WordPress